
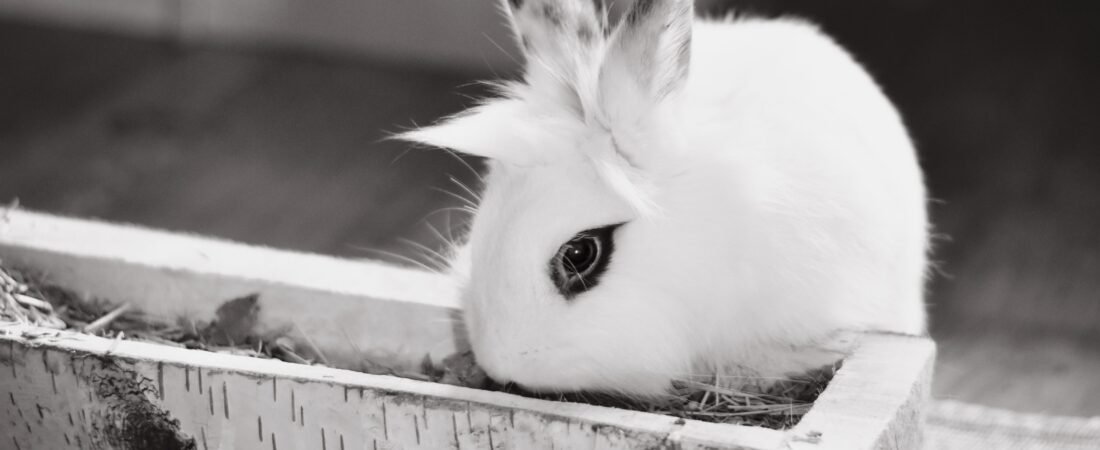
A familiar litter box can become an unexpected obstacle as a rabbit grows older. A tray that was once easy to enter may gradually become less convenient when its front wall requires a higher step, particularly if the rabbit has begun moving more cautiously or spending additional time resting. Replacing the entire litter area is not always necessary, however, because a thoughtfully designed low-entry tray may offer a more accessible alternative while preserving the routines and surroundings the rabbit already recognizes.
Making a DIY low-entry rabbit litter box involves more than cutting an opening into a plastic container. The finished tray needs to provide adequate room for turning, a stable base that does not slide across the floor, a smooth entrance without exposed sharp edges, and sufficient containment to prevent litter and moisture from spreading into the surrounding living space.
This guide explains how to evaluate a suitable container, create a safer low-entry opening, prepare the tray for everyday use, and recognize when a ready-made alternative may be more practical. The emphasis is on straightforward home modifications, careful observation, and the limitations of DIY equipment rather than treating changes in mobility or litter habits as problems that can always be solved by altering a box.
Why a Low-Entry Litter Box Can Be Useful for an Older Rabbit
Rabbit litter trays are commonly designed with raised walls to contain bedding, scattered hay, and urine. Although these features make routine cleaning easier, a relatively high entrance can become inconvenient for a rabbit that no longer approaches obstacles with the same confidence or flexibility it once had.
Some rabbits adapt by entering more slowly, approaching the tray from a different angle, or hesitating before stepping over the front edge. Others may begin spending time beside the litter box rather than inside it, although changes in toileting behavior can have several possible explanations and should not automatically be attributed to the height of the tray.
The San Diego House Rabbit Society’s litter-box training guidance identifies litter-box size, design, and mobility-related discomfort among the factors that can influence whether a rabbit uses a particular tray.
A lower entrance may make the litter area more convenient to approach, but accessibility depends on the complete arrangement. A rabbit still needs enough interior space to reposition comfortably, a surface that remains stable underfoot, and a location that does not require navigating slippery flooring or unnecessary obstacles.
For a broader comparison of commercially available designs and the features worth considering, see our guide to Low-Entry Litter Boxes for Senior Rabbits: What to Use When Regular Trays Are Too High.
Before You Begin: Decide Whether DIY Modification Is Appropriate
Not every plastic container is a suitable candidate for modification, and not every rabbit will benefit from a homemade tray. The safest starting point is to examine the rabbit’s existing litter area and identify the particular feature that appears inconvenient, rather than assuming the entire box needs replacing.
If the current tray is already spacious, stable, and easy to clean, reducing the entrance height may be the only structural change worth considering. If the box is too narrow, has a flexible bottom, or is made from brittle plastic, replacing it with a more appropriate container may be a better option than attempting to modify it.
A rabbit that chews plastic persistently, pulls at loose edges, or regularly damages household equipment also requires particular caution. A cut plastic container should not be used if the rabbit can detach or swallow pieces, and any modification that creates an exposed or deteriorating edge should be rejected.
The House Rabbit Society’s litter-training guidance emphasizes the importance of adequate litter-box size, practical placement, and a clean environment, making these useful considerations before selecting a DIY design.
A sudden change in mobility, persistent difficulty entering the tray, or an unexpected change in urination habits deserves assessment by a rabbit-experienced veterinarian. A lower entrance may improve the convenience of the environment, but it cannot establish or address the underlying cause of a behavioral or physical change.
Choosing the Right Container for a DIY Low-Entry Rabbit Litter Box
Look for a Spacious, Rigid Plastic Tray
A large, open plastic litter pan or shallow storage container is generally a more promising starting point than a small corner litter box. The container should provide enough room for the rabbit to enter, turn around, settle into a comfortable position, and leave without having to squeeze against the sides.
Rigid plastic is useful because it is relatively lightweight, does not absorb moisture in the way untreated cardboard does, and can usually be washed thoroughly. However, rigidity should not be confused with brittleness: some hard plastics crack when cut, creating sharp fragments or stress points that can make the container unsuitable.
Before purchasing a container specifically for modification, inspect its shape and construction. Containers with complicated molded corners, reinforced ribs across the intended entrance, or unusually thin walls may be difficult to modify cleanly.
The House Rabbit Society’s litter-box recommendations favor roomy, easy-to-clean trays and discuss low-sided storage boxes as one option for older rabbits or rabbits with disabilities.
Consider the Height of the Remaining Walls
A low entrance does not necessarily require a tray with low walls on every side. In many setups, retaining taller walls along the back and sides helps contain litter and reduces the amount of material scattered beyond the box.
A practical design may therefore have one lowered entry section and three relatively higher sides. The best arrangement depends on the rabbit’s size, usual toileting position, and the location of the tray within the enclosure.
There is no single entrance measurement that can be assumed suitable for every senior rabbit. A useful opening should be low enough for the individual rabbit to negotiate comfortably while leaving enough material beneath it to preserve the strength of the container.
If achieving an accessible entrance would require cutting through most of the tray’s structural support, the container is probably not a good candidate for modification.
Avoid Containers That Create Additional Hazards
Containers previously used to store chemicals, paint, cleaning concentrates, or other potentially hazardous substances should not be repurposed as rabbit litter trays. A container’s apparent cleanliness does not establish that it is appropriate for prolonged contact with an animal.
Similarly, avoid brittle, cracked, heavily scratched, or visibly deteriorating plastic. Containers with detachable decorative pieces, exposed fasteners, or surfaces that cannot be cleaned thoroughly introduce unnecessary complications into a project intended to simplify the rabbit’s environment.
The RSPCA’s guidance on creating a suitable rabbit home recommends smooth, rounded edges, non-toxic materials, and regular inspection of items for damage or potential injury.
Materials and Tools for a Simple DIY Setup
The most straightforward version of this project begins with a suitable container and uses as few additional components as possible. Complicated attachments, decorative finishes, and improvised ramps can introduce more problems than they solve, particularly when a rabbit is likely to investigate new objects by chewing them.
| Item | Purpose | What to Look For |
|---|---|---|
| Large, rigid plastic tray or storage container | Forms the litter box | Spacious interior, stable base, washable surface |
| Measuring tape and washable marker | Helps plan the entrance | Clear markings that can be removed afterward |
| Appropriate plastic-cutting tool | Creates the lower opening | A tool suited to the container material and used by a competent adult |
| Fine finishing tool suitable for plastic | Removes roughness from the cut | Ability to leave a smooth, continuous edge |
| Stable, washable floor covering | Helps prevent movement around the tray | Non-slip, easy to clean, and inaccessible to destructive chewing |
| Rabbit-safe absorbent litter | Provides a suitable toilet surface | Unscented, non-clumping, and appropriate for rabbits |
| Fresh hay | Supports familiar litter-area routines | Positioned where the rabbit can reach it comfortably |
Power tools, sharp blades, and cut plastic fragments should always be kept away from rabbits. If you do not have the equipment or experience needed to produce a clean, structurally sound opening, purchasing a suitable low-entry tray is preferable to attempting an uncertain modification.
How to Make a DIY Low-Entry Rabbit Litter Box
Step 1: Examine the Existing Litter Area
Before modifying anything, observe the rabbit’s normal approach to its litter box. Pay attention to the direction from which it enters, whether it pauses at the front edge, and whether nearby rugs, bedding, or furniture affect the route.
These observations can help determine where an entrance should be positioned. A lowered opening is less useful if it faces a wall, a slippery section of flooring, or an obstacle that requires the rabbit to turn awkwardly before entering.
If the rabbit has a preferred toileting corner, maintaining that location may help preserve familiar habits. The RSPCA and House Rabbit Society both recognize the importance of placing litter trays where rabbits naturally choose to eliminate.
Step 2: Plan a Wide, Accessible Entrance
With the container empty and clean, identify the side that will face the rabbit’s normal approach. Mark an opening that provides sufficient width for comfortable entry without forcing the rabbit to brush against the remaining plastic walls.
The opening should have gently rounded corners rather than sharp internal angles, because abrupt corners can concentrate stress in some plastics and may contribute to cracking after repeated use.
Avoid choosing a height based solely on photographs or generic measurements. The intended entrance should be evaluated against the individual rabbit’s movement, while ensuring the remaining wall is strong enough to support the tray during lifting, cleaning, and everyday use.
A design that requires extensive cutting or leaves the front edge weak should be abandoned in favor of a purpose-made alternative.
Step 3: Cut the Opening Away From the Rabbit
Remove the container from the rabbit’s living area before beginning any modification, and work in a separate, well-ventilated space using equipment appropriate for the material.
Follow the cutting tool manufacturer’s instructions, secure the container against movement, and use appropriate protective equipment. Cutting plastic can create sharp fragments, rough edges, or dust, while excessive heat may deform the material or produce irritating fumes.
The goal is a controlled opening with no cracks, loose fragments, or damaged sections. If the plastic splinters, fractures, or becomes distorted during cutting, do not attempt to conceal the damage with tape or improvised coverings; discard the unsuitable container.
For readers who are uncomfortable cutting plastic, an unmodified shallow tray with a naturally low entrance is a reasonable alternative and may be easier to maintain over time.
Step 4: Smooth and Inspect Every Cut Edge
A newly cut entrance should never be considered finished until the entire exposed edge has been inspected. Even a small plastic burr can create an uncomfortable contact point when a rabbit repeatedly steps across it.
Use a finishing method suitable for the particular plastic, then check the opening for sharpness, roughness, cracking, and sections that flex excessively. Pay particular attention to the corners, where stress or uneven cutting may be less obvious.
Do not rely on adhesive tape, glued-on trim, foam edging, or similar materials to cover a poorly finished opening. These additions may loosen during washing or become accessible to a rabbit that chews, introducing hazards that would not exist with a properly finished tray.
If the edge cannot be made consistently smooth and durable, the tray should not be used.
Step 5: Wash the Container Thoroughly
Once the structural work is complete, remove all plastic debris and clean the container using a rabbit-appropriate cleaning method. The tray should be rinsed thoroughly and allowed to dry completely before litter is added.
Cleaning is particularly important after modification because fine fragments can remain around molded corners or along the underside of the entrance.
Inspect the base and walls again after washing. A container that changes shape noticeably when handled, develops cracks, or no longer sits evenly on the floor is not suitable for continued use.
Step 6: Position the Tray on a Stable Surface
Place the finished box in a familiar, accessible location and check whether it remains stable when gentle pressure is applied near the entrance. The container should not rock, tip, or slide across the floor.
If the surrounding surface is slippery, a suitable washable, non-slip floor covering may improve the approach to the litter area. Any covering should remain flat, avoid creating a raised obstacle at the entrance, and be appropriate for a rabbit that may chew or dig.
Our article on Best Waterproof, Non-Slip Flooring for Senior Rabbits: Washable Mats and Rugs Compared explores the practical differences between washable rugs, absorbent mats, and protective underlayers.
The litter box should remain accessible without requiring the rabbit to climb over bedding, squeeze between furniture, or navigate an unnecessarily narrow passage.
Step 7: Add Suitable Litter and Fresh Hay
Prepare the tray with a modest, appropriate layer of absorbent litter, making sure the material does not accumulate into a mound that effectively raises the entrance again.
Unscented, non-clumping paper-based litter is a practical option for many household rabbits, although suitability depends on the particular product and the rabbit’s habits. Clumping cat litter, scented products, and litter containing inappropriate additives should be avoided.
The RSPCA’s rabbit litter-training guidance explains why litter selection matters and identifies risks associated with certain cat-litter materials.
Fresh hay can be offered at one end of the tray or from an accessible feeder positioned nearby, provided the arrangement allows the rabbit to reach it without stretching awkwardly or negotiating another obstacle.
The San Diego House Rabbit Society’s litter-box setup guide describes the use of absorbent bedding and fresh hay to create a familiar, inviting litter area.
DIY Low-Entry Litter Box Designs Compared
There are several ways to create a lower entrance, but they do not offer the same balance of simplicity, stability, and cleaning convenience.
| Design | Main Advantage | Main Limitation | Practical Consideration |
|---|---|---|---|
| Large plastic tray with a lowered front opening | Retains taller side and rear walls | Cutting can weaken or damage unsuitable plastic | Best considered when the container can be modified cleanly |
| Naturally shallow, unmodified tray | Avoids cutting and exposed modified edges | Low walls may allow more litter or urine to escape | Often the simplest starting point |
| Low-sided under-bed storage container | Can provide generous floor space | Some containers are flexible or too shallow | Check base rigidity and overall dimensions |
| Purpose-made low-entry litter box | Requires no home cutting | Available sizes and designs may be limited | Useful when DIY modification would introduce uncertainty |
The lowest entrance is not automatically the best design. A stable tray with a comfortable approach, adequate room, and manageable cleaning requirements may be more useful than a very shallow container that allows moisture to spread across the surrounding floor.
How to Keep a Homemade Litter Box Clean and Dry
A lower entrance can make access easier, but it can also reduce the tray’s ability to contain scattered litter or urine near the front edge. This trade-off should be considered before the modification is made, particularly when the rabbit regularly toilets close to the entrance.
Inspect the tray and surrounding floor daily for dampness, scattered litter, and soiled hay. Remove wet material promptly, replace contaminated bedding, and clean the tray regularly rather than relying on its surface appearance as evidence that the contents are dry.
The RSPCA’s rabbit housing guidance recommends daily attention to toilet areas and emphasizes the importance of a clean, dry environment.
A washable protective layer beneath the box may make accidental spills easier to manage, but it should not become a substitute for keeping the litter itself clean. Protective coverings also need to remain flat and secure so they do not create an additional obstacle at the entrance.
During routine cleaning, examine the modified edge for new cracks, rough patches, or signs of chewing. Repeated washing, handling, and daily use can reveal weaknesses that were not obvious immediately after construction.
If the tray begins deteriorating, replace it rather than repeatedly patching the damaged section.
Common DIY Litter Box Mistakes to Avoid
Making the Entrance Too Narrow
A narrow entrance can undermine the purpose of a low-entry design by requiring the rabbit to approach at a precise angle or squeeze through an uncomfortable gap. The opening should accommodate the rabbit’s body and normal movement without forcing unnecessary contact with the side walls.
Choosing a Container That Is Too Small
A compact container may appear convenient within an enclosure, but a rabbit needs enough space to turn around and settle comfortably. A larger tray with an appropriately positioned entrance is generally more practical than a small corner unit that restricts movement.
Leaving Sharp or Unfinished Plastic
A rough opening is not an acceptable compromise, even if the rabbit appears willing to use the box. Exposed edges should be consistently smooth, and containers that crack or splinter during modification should be rejected.
Adding Chewable Ramps or Loose Attachments
A homemade ramp is not automatically necessary simply because a rabbit is older. Loose coverings, glued components, or unstable attachments can create additional hazards, while an appropriately low entrance may remove the need for a separate ramp altogether.
Ignoring the Surrounding Floor
A well-designed tray can still be inconvenient when placed on a slippery surface. The approach, entrance, and interior should be considered together rather than treating the box as an isolated piece of equipment.
Assuming Every Litter Accident Is an Accessibility Problem
Changes in toileting habits can occur for reasons unrelated to the height of a litter box. Persistent accidents, unusual urine patterns, or sudden behavioral changes should not be managed solely through environmental modifications.
How to Introduce the New Litter Box Without Disrupting Familiar Routines
Rabbits often establish strong preferences for particular toileting locations and arrangements, so replacing a familiar box can require patience even when the new design appears more convenient.
Where practical, position the homemade tray in the same location as the original and maintain familiar litter and hay arrangements. Avoid changing the tray, surrounding flooring, feeding position, and enclosure layout simultaneously, because multiple changes make it harder to understand which elements the rabbit accepts or dislikes.
Observe the rabbit’s behavior without forcing it into the new box. A comfortable setup should allow the rabbit to approach voluntarily, investigate the entrance, and decide whether to use the space.
The House Rabbit Society’s litter-training advice supports working with a rabbit’s preferred toileting location and using positive, low-stress methods to encourage litter-box use.
If the rabbit consistently avoids the new tray, reassess its size, location, surface, and entrance rather than assuming additional training is the only solution. Returning temporarily to a familiar, safe arrangement may be preferable to persisting with a modification that does not suit the rabbit.
When a Ready-Made Low-Entry Litter Box Is the Better Choice
DIY modification can be economical when an appropriate container is already available and can be altered safely, but it should not be treated as the superior option in every situation.
A ready-made low-entry tray may be preferable when suitable tools are unavailable, the plastic cannot be cut without cracking, or the finished entrance would be difficult to clean and inspect. It may also be the more sensible purchase when the cost of a container and modification supplies approaches that of a purpose-made product.
For owners comparing alternatives, the most useful purchasing criteria are the interior dimensions, entrance accessibility, stability, ease of cleaning, and whether the design provides enough containment for the rabbit’s normal habits.
A product described as suitable for senior pets is not necessarily suitable for rabbits, and marketing claims should be evaluated against the actual dimensions and construction of the tray.
Frequently Asked Questions
Can I use a plastic storage container as a rabbit litter box?
A suitable plastic storage container can serve as a litter tray when it is spacious, stable, easy to clean, and free from hazardous edges or materials. However, not every storage container is appropriate, particularly if its walls are brittle, its base flexes excessively, or modifying it would compromise its structure.
How low should the entrance be for a senior rabbit?
There is no universal entrance height that suits every older rabbit. The appropriate height depends on the individual’s size, movement, and comfort, while the tray must retain enough structural integrity to remain stable and safe.
Is it better to cut a litter box or buy a shallow tray?
An unmodified shallow tray is often the simpler choice because it avoids the hazards associated with cutting plastic. A modified tray may offer the advantage of retaining higher walls around most of the box, but only when the entrance can be finished smoothly without weakening the container.
What should I put inside a homemade rabbit litter box?
Choose an absorbent, rabbit-appropriate litter without clumping ingredients or unnecessary fragrances, and provide fresh hay in an accessible position. The arrangement should be easy to clean and should not create an additional step at the entrance.
Can a low-entry litter box stop an older rabbit from having accidents?
A lower entrance may make the tray more convenient when access is part of the difficulty, but it cannot resolve every cause of changes in litter habits. Persistent or sudden changes should be discussed with a rabbit-experienced veterinarian rather than attributed solely to the design of the box.
How often should I inspect a DIY litter box?
The litter area should be checked daily for cleanliness and moisture, while the modified entrance should also be inspected regularly for cracks, roughness, or chewing damage. A homemade tray should be replaced whenever its condition makes continued use uncertain.
Final Thoughts
A DIY low-entry rabbit litter box can be a practical way to adapt a familiar living space when an ordinary tray has become inconvenient, provided the modification is approached as a safety and accessibility project rather than simply a cost-saving exercise.
The strongest design is usually the simplest one: a roomy, rigid container with a smooth entrance, a stable base, appropriate litter, and a location that the rabbit can approach comfortably. If cutting the container introduces sharp edges, weakens the structure, or requires questionable attachments, choosing a suitable unmodified or purpose-made tray is the better decision.
For senior rabbits, small environmental adjustments can help preserve familiar routines, but the finished setup should always be evaluated through careful observation of the individual animal. Comfort, cleanliness, and safe access matter more than whether the litter box was purchased ready-made or adapted at home.